
Creating an Inventory Plan is simple and begins by selecting Add Plan from the Sandbox page or by selecting either the Add Plan or Add Campaign button from the main Campaign page. In this article, we will detail the steps a user will follow to create an Inventory Plan after selecting first the Add Plan button and then the Add Campaign button


Method 1: Add Plan
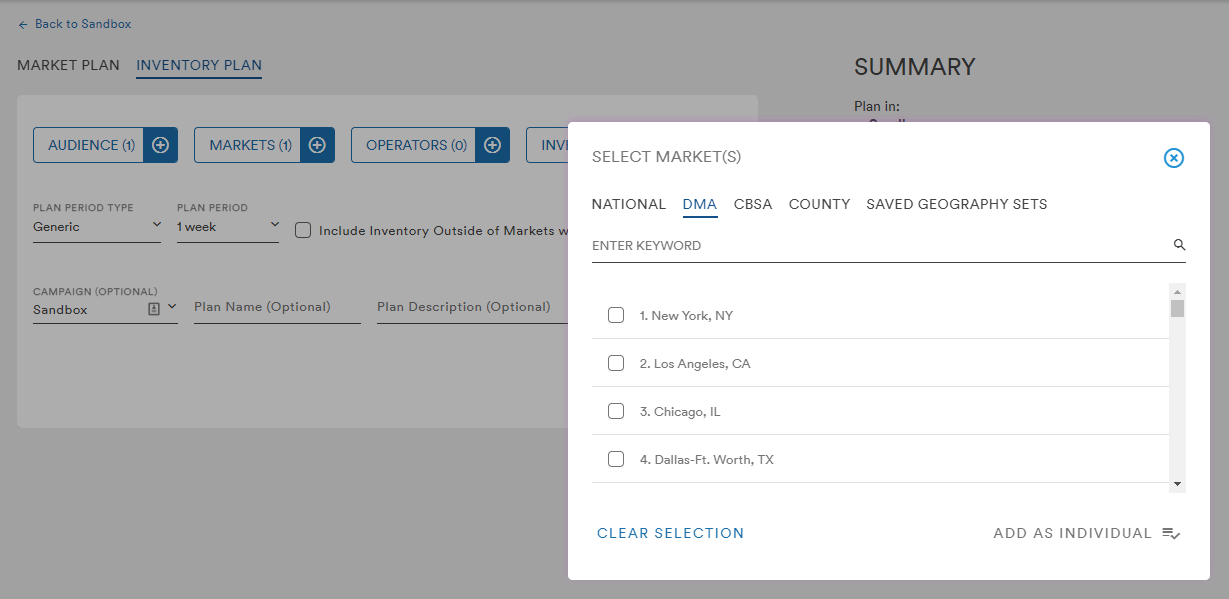
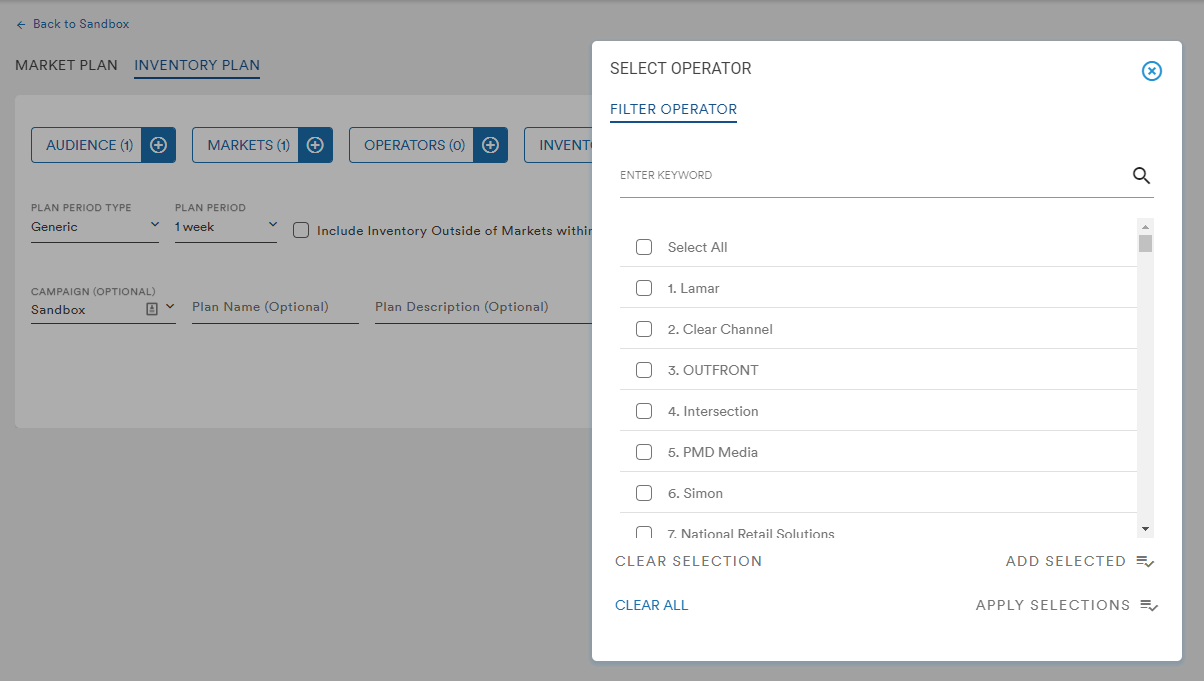
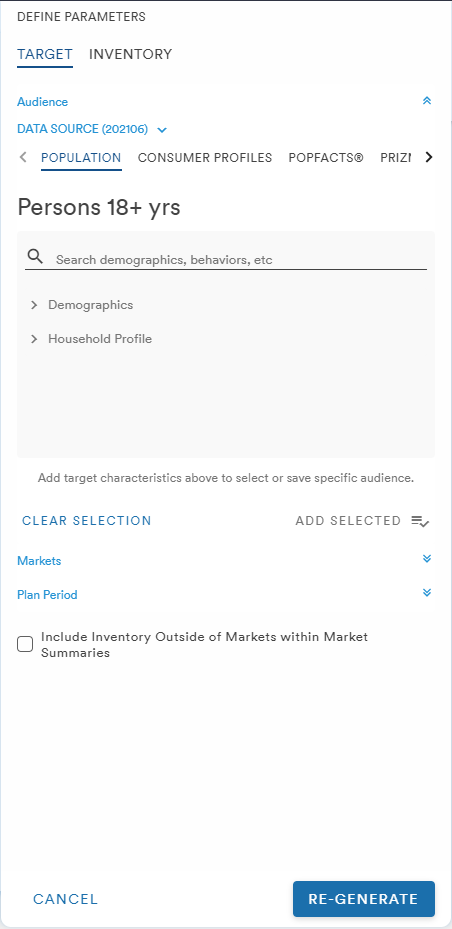
When creating an Inventory Plan from the Add Plan button, the user is able to select their Audience, Market, and Inventory. At least one selection from each of these three attributes is required to generate an Inventory Plan. 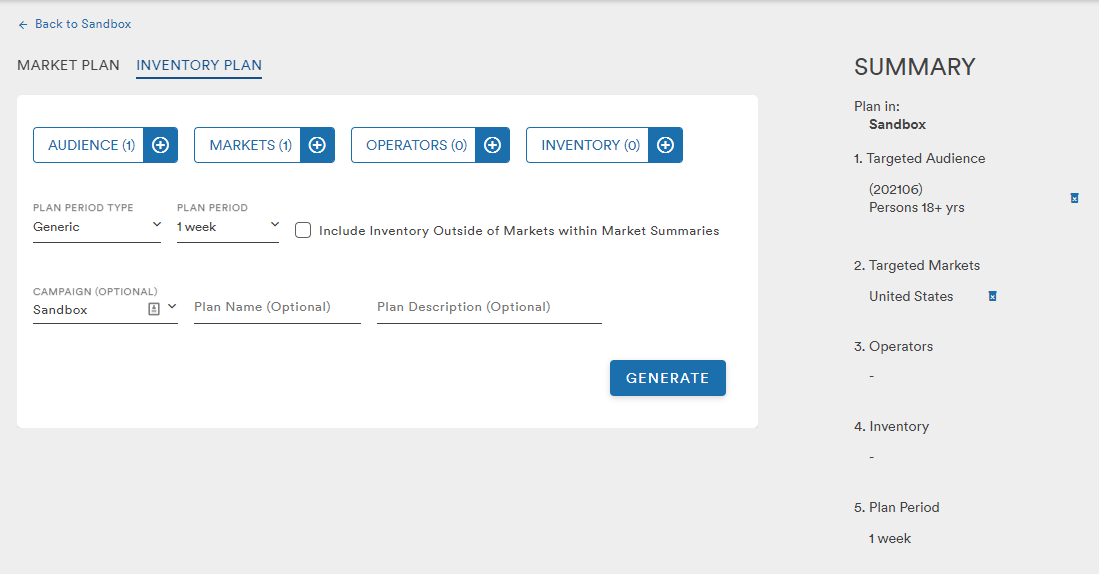
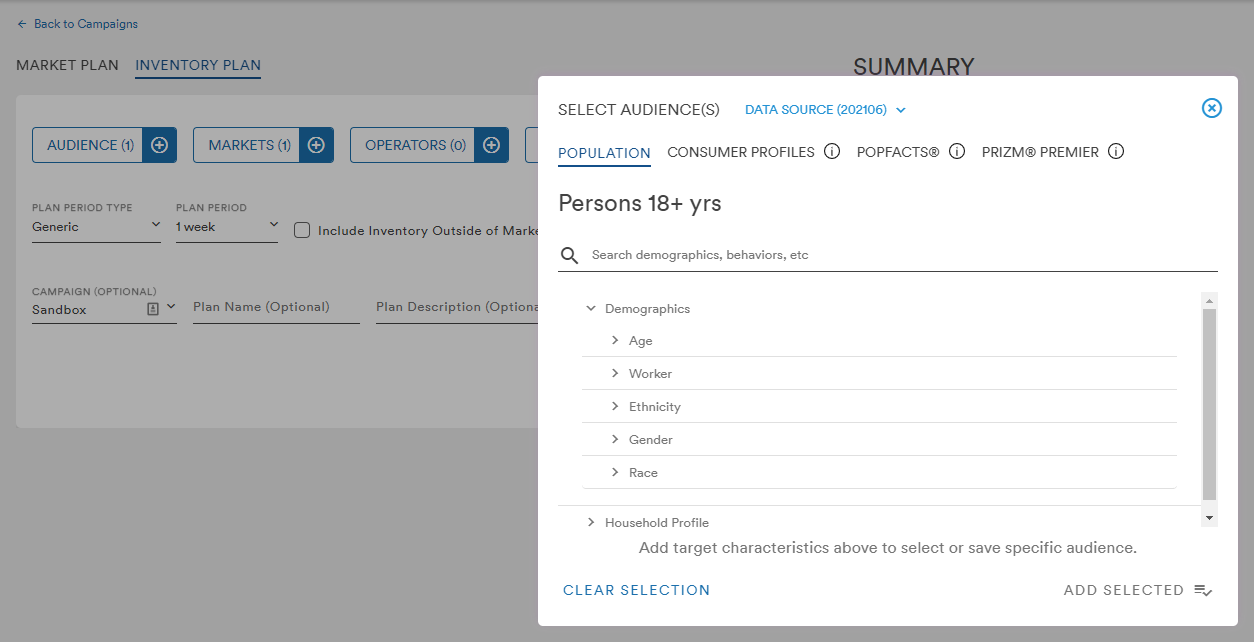
The Audience menu provides the user with the option to select their audiences using the default 2021 Mid-Year Data Source (202106), or audiences from the legacy 2021 and 2020 Data Sources from a dropdown
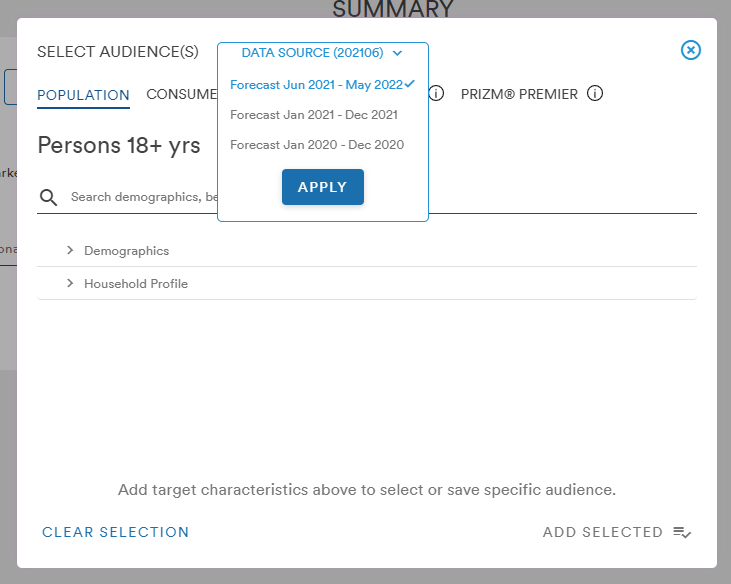
The Audience, Market, Operators, and Inventory menus in the updated Workspace are structured in much the same way as in the legacy Workspace:
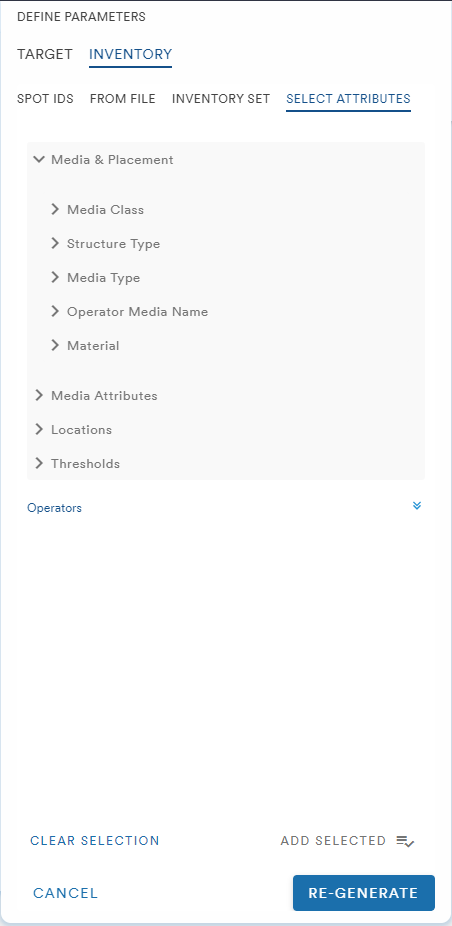
The Inventory selection menu provides all the options to add specific Spots, Upload a CSV of Spots and Dates, Apply a saved Inventory Set, or Filter by Media, Place, Location, etc.
Inventory Plan is best experienced by applying specific spot IDs as the media filters can cause plans to fail due to narrow search parameters or too many spots requested of the API
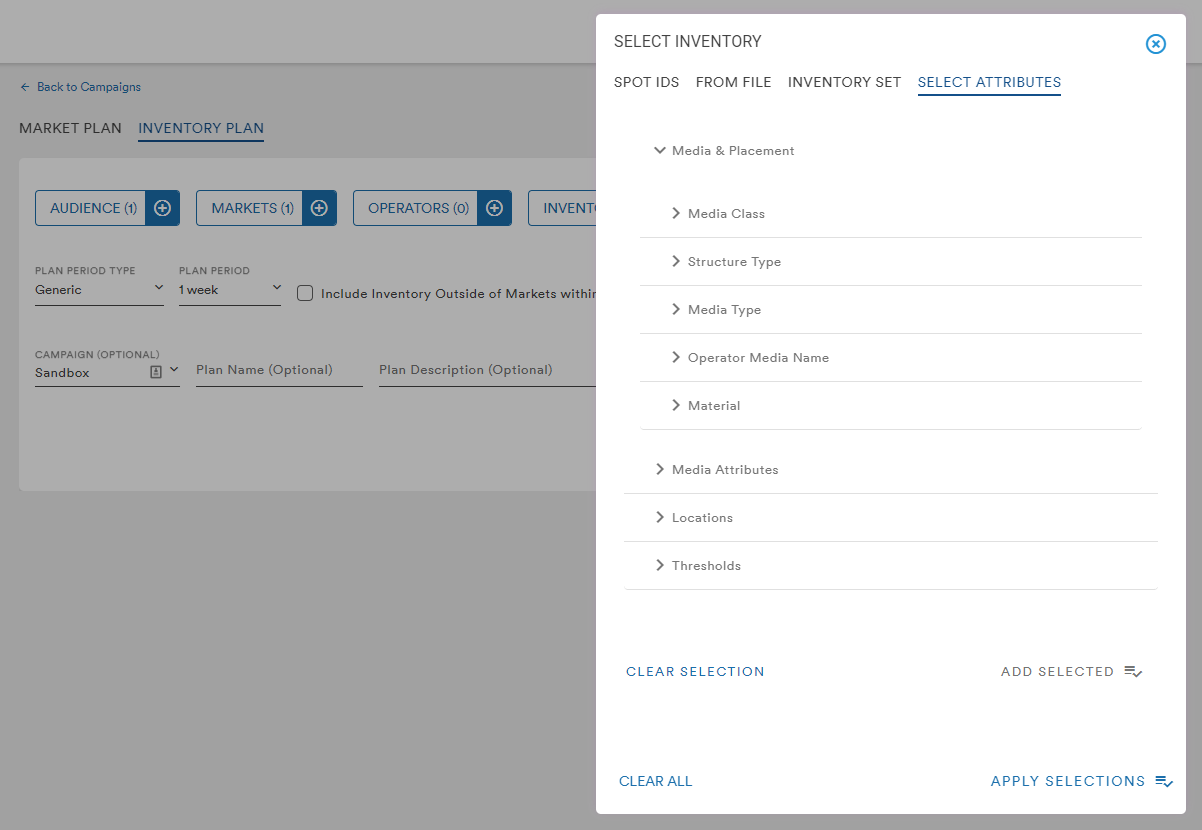
Adding Inventory from Media Attributes
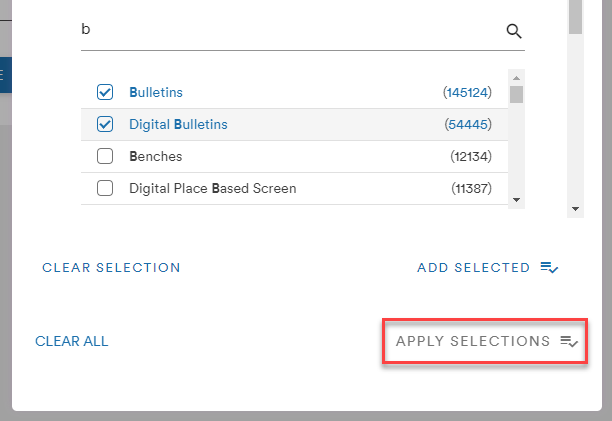
When selecting Media Attributes from the Media & Placement menu, the user is required to first click the Add Selected button before the Apply Selections button
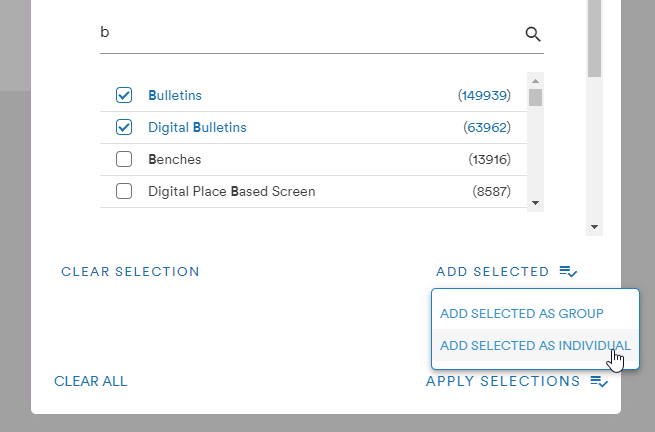
If multiple Media selections are checked, the user will be given the option to add their selections as a group or as individual media
The user will be shown a confirmation of their media selection and the Apply Selections button will be available to add the media to the Inventory Plan

Adding Inventory From File
Users can upload a CSV with spots and dates from the plan generation page with the From File tab
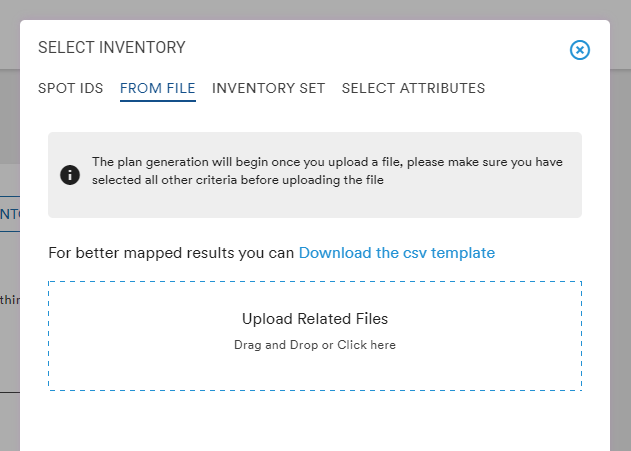
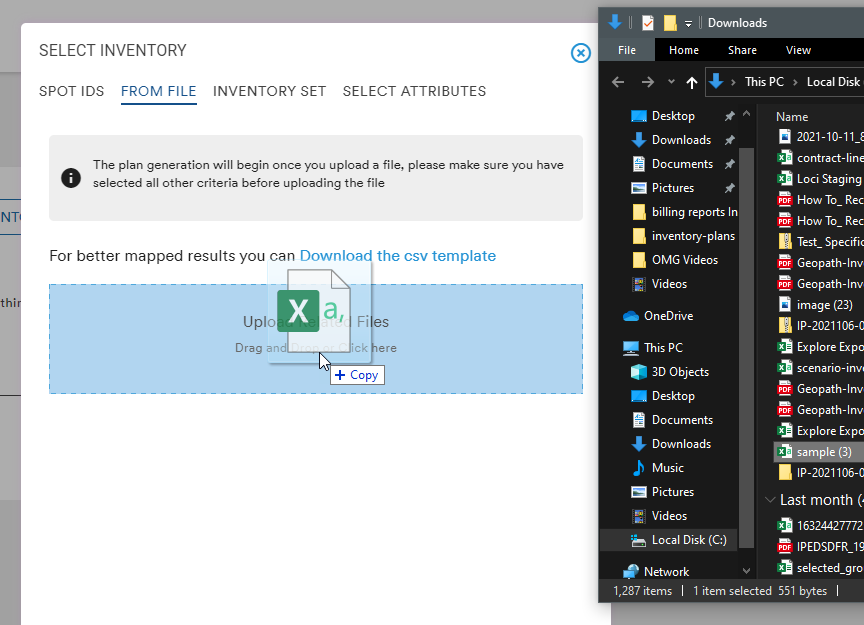
A file can be added by dragging-and-dropping from a folder or by clicking the "Upload Related Files" text
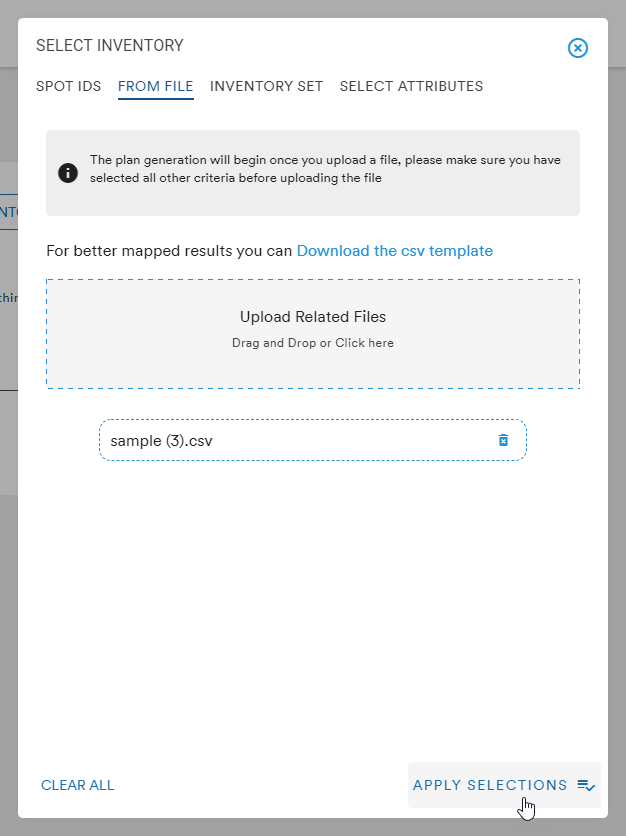
Clicking Apply Selections will begin the process of validating the inventory and auto-assigning market(s) based on the inventory database
Validation popup: 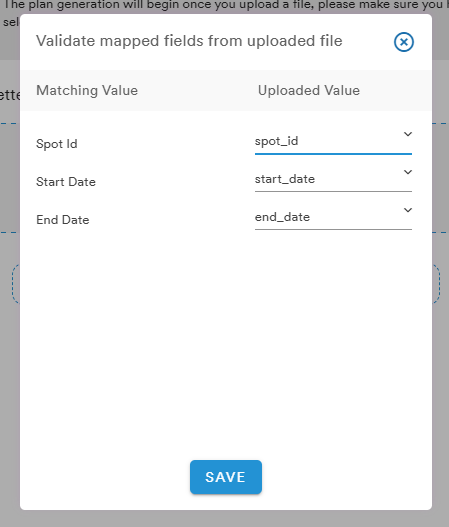
Confirmation popup: 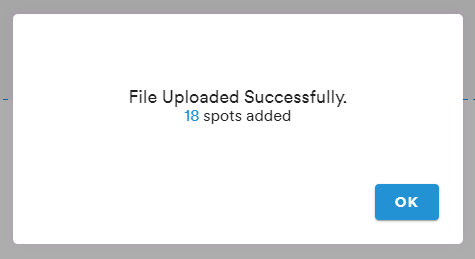
Once the inventory ID are validated, the "Select Market Type to Auto-Assign Inventory’s Market" menu will appear
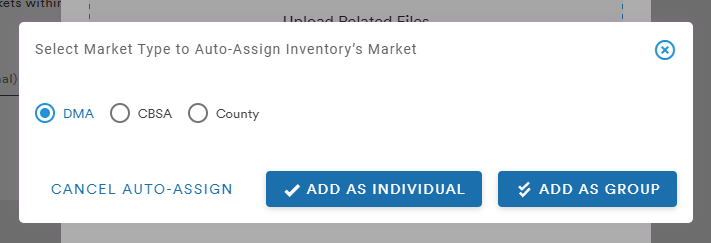
Whenever specific inventory is selected, the system needs to know if the selected market(s) needs to be reassigned when pulling measures for the inventory. If the user hasn't selected a market yet, they can choose to filter at the DMA, CBSA, or County level and add those markets as a group or run them individually
If the user has already assigned their market(s), they can choose Cancel Auto-Assign which prevents the system from over-riding their market selection
*It's important to note that the Add Inventory From File function will initiate the plan generation process. Please ensure that other plan filters have been selected before uploading a file. This is a known issue and a fix to the workflow is forthcoming
Other Selections
Once these selections have been made, the user can also adjust the following details:
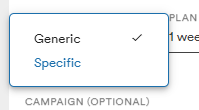
- Plan Period
- Generic: 1, 2, 4, 8, 12, 26, or 52 Weeks (26 and 52 Weeks are only available for 202106 and 2021 audiences)
- Specific: any date range using the format dd/mm/yyyy

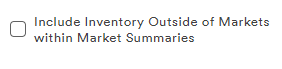
Users can also choose to have the "Include Inventory Outside of Markets within Market Summaries" button checked or unchecked. Checking this box will allow for measures to be pulled for inventory that doesn't exist in a targeted market. The default state for this box is unchecked
(Users can find a more detailed overview of this feature here)
NEW PLAN ORGANIZATION:
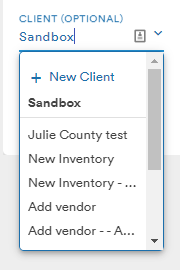
The default Campaign in this method is the Sandbox. The Sandbox is like a "Drafts" folder so that you don't have to assign a plan to a specific campaign just to pull a report. You can create as many plans as you like within Sandbox and also Move or Duplicate a Plan (using the Actions button) into a Campaign later if you'd like.
The user can use the dropdown to assign this new Inventory Plan to any existing Campaign or create a new Campaign using the +New Campaign link
Selections made in the menus will be reflected in the Summary column to the right.

If the user needs to remove a filter, hovering over the selection in the Summary list will make a trash can icon appear which can be used to delete the filter

Clicking the Generate button will bring the user to the Campaign page where they can select their Inventory Plan. While the plan is pulling data, the user is brought back to the Plan page where the plan will show that background processes are operating
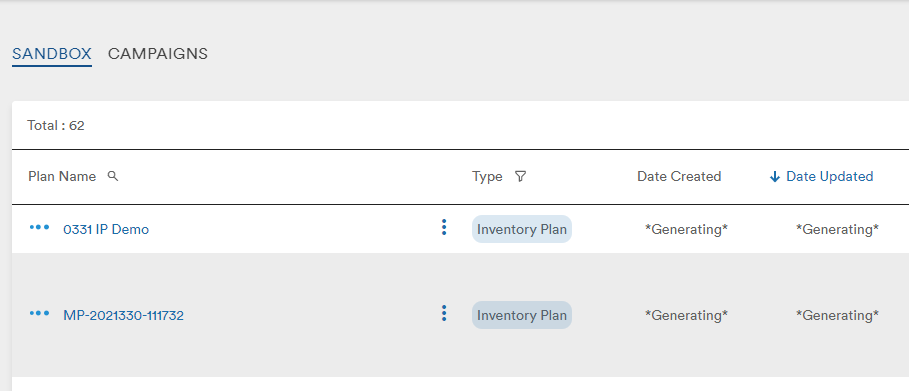
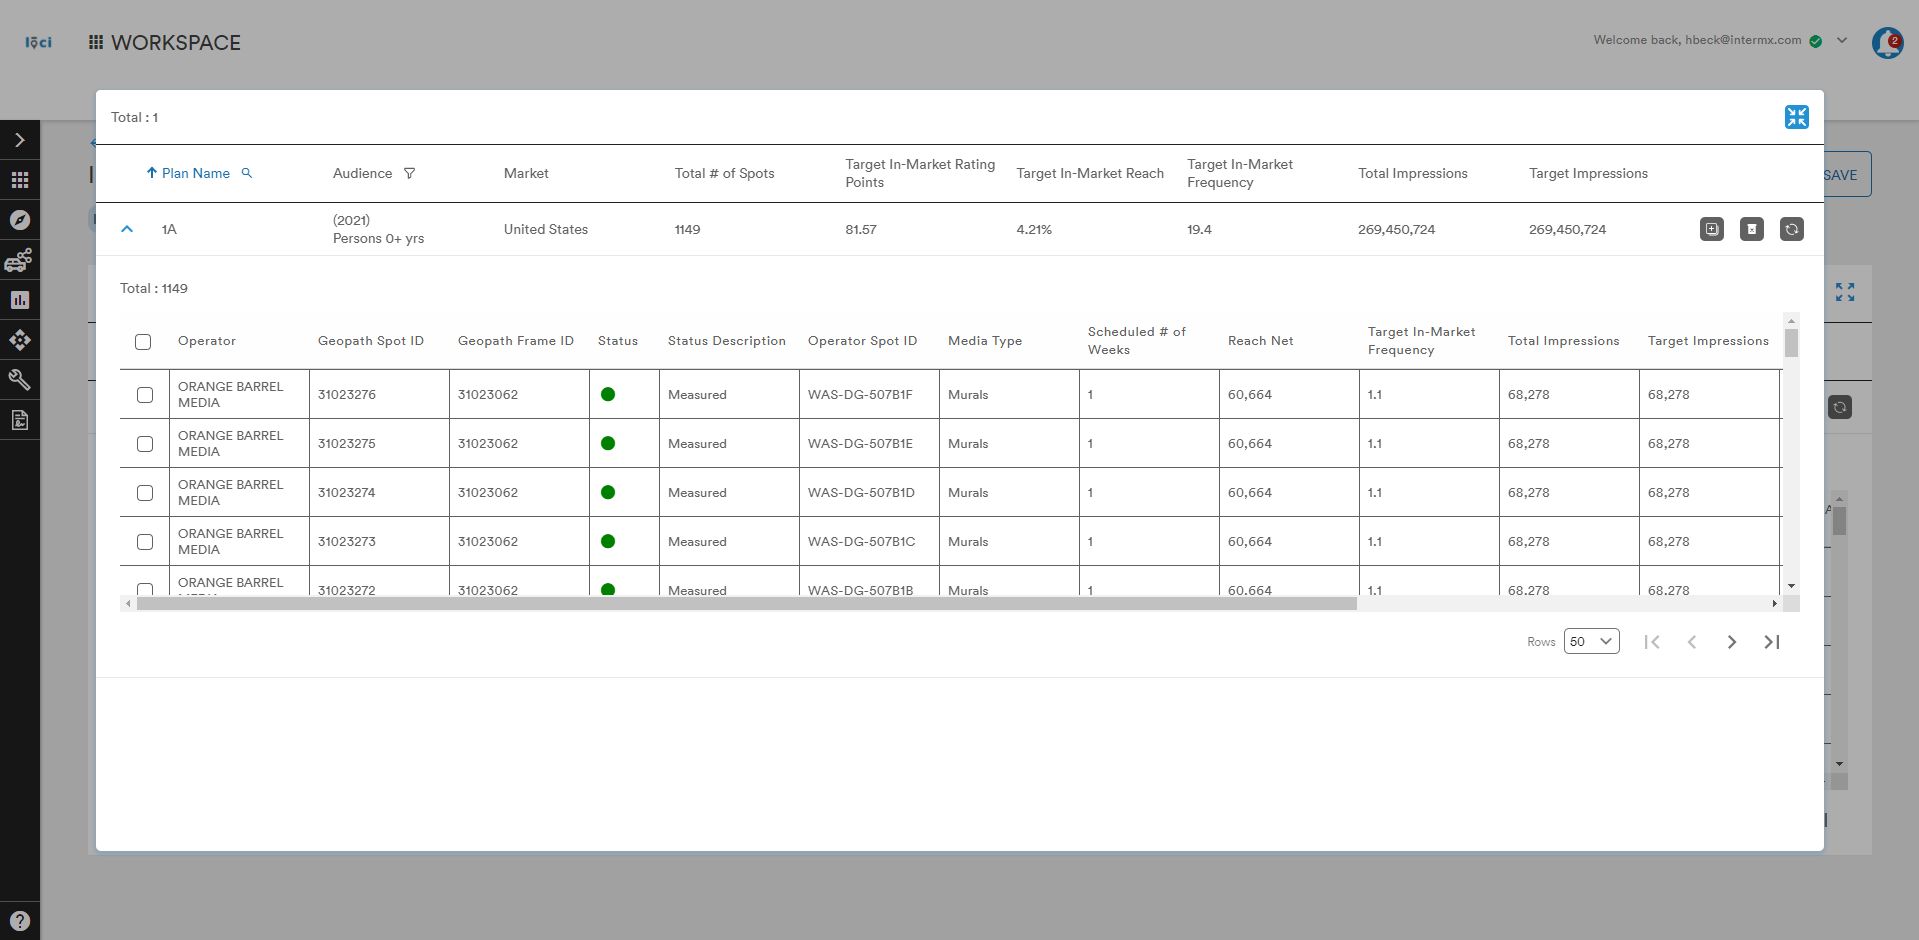
Once the plan is finished, the user can open the plan and view their Inventory Plan
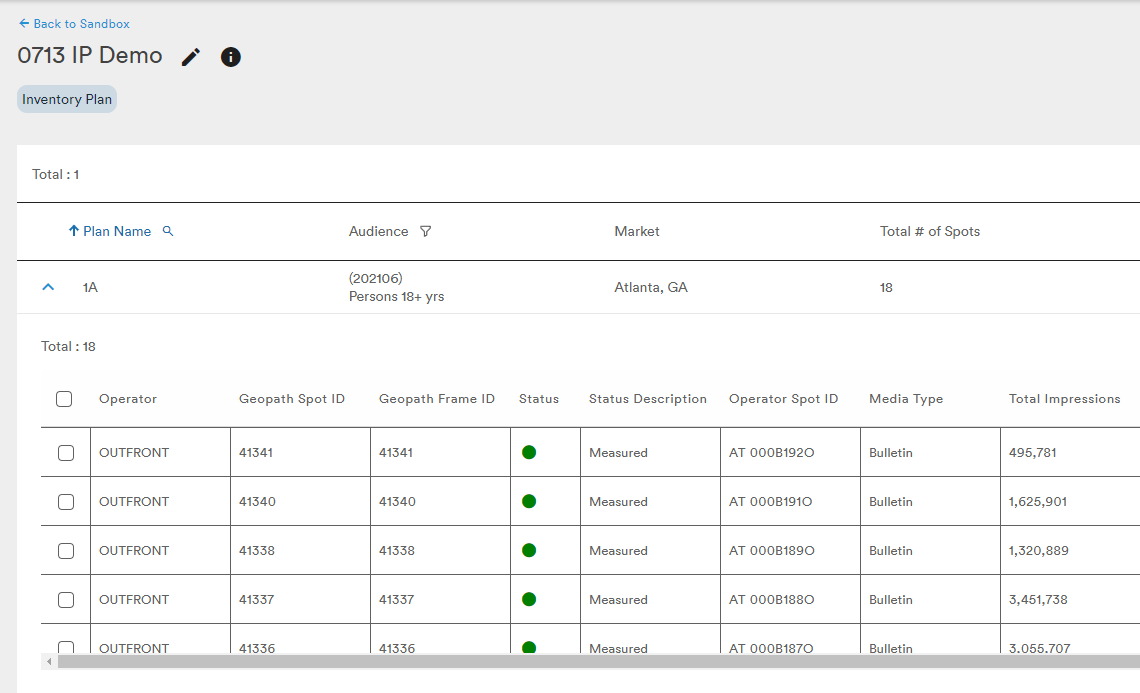
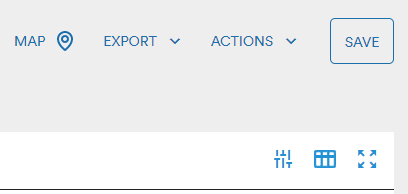
With the Inventory Plan loaded, the user is given four options at the top of the Plan:
- Map the plan to the Explore module (will open a new browser tab)
- Export the Plan as a CSV
- Delete, Duplicate, or Generate a Market Plan based on the Inventory Plan's parameters under the Actions dropdown
- Save the plan
The user can also select the Parameters or Customize Columns icons to further edit their Inventory Plan
The Parameters menu allows the user to adjust their Audience, Market, and Media as well as Filter Inventory
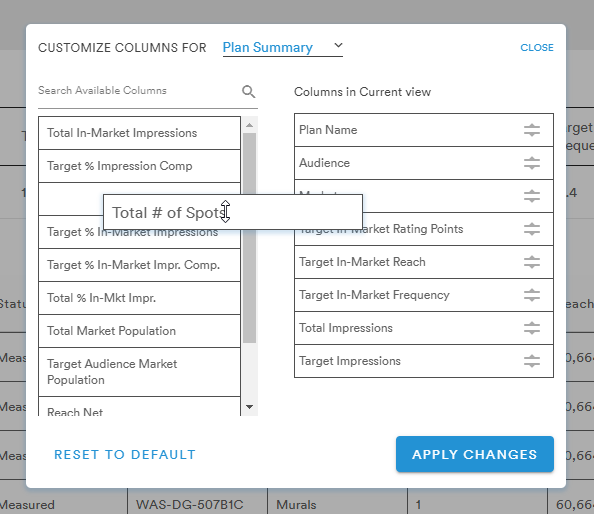
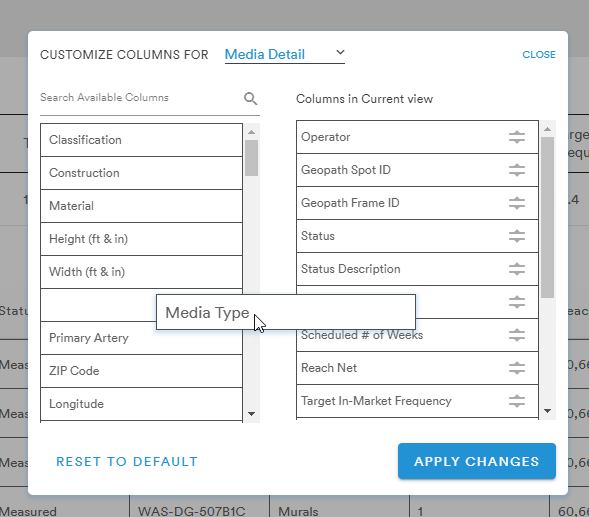
The Customize Columns icon allows the user to select which data sets they want to see in their Inventory Plan. Edits to the columns are easily made by dragging and dropping the selected headings from one side of the menu to the other
The user can choose to update the headings of the overall plan summary or the detailed media metrics of the plan packages
(a more detailed look at the Customize Columns buttons can be found here)
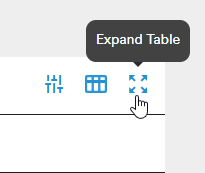
The Expand Table button allows the table to be view in a larger area:
Method 2: Add Campaign
Selecting the Add Campaign button from the main Campaign page prompts the user to create and name their new Campaign. A description is optional
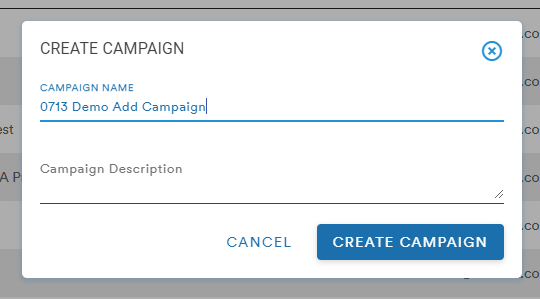
Once the Plan is given a name and the Create Campaign button selected, the user is taken to a blank Campaign page from which they can add a new plan
This brings the user to the same Market and Inventory Plan creation page from the beginning of Method 1 but the Campaign has been named
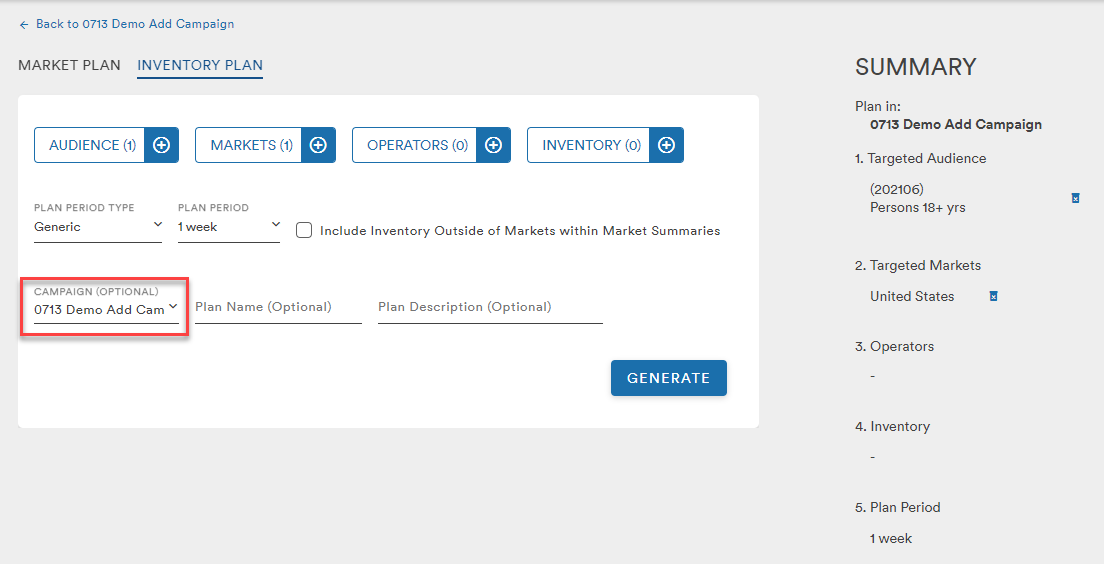 From here, the user can select their Audience, Market, Operator, and Inventory and generate their Inventory Plan as previously described
Comments
0 comments
Please sign in to leave a comment.